Google Calendar Sharing

One of my "greatest hits," if you will, is called "Publish iCal Calendars on the Internet for Free," and it's about just that: publishing and subscribing to your iCal calendars using Box.net's free and WebDAV-friendly file sharing service. This method of calendar sharing has helped me (and others, I presume) keep tabs on all our calendars from one central location, but it's not been without its share of hassles and limitations. One problem has been that Box.net has never officially supported WebDAV, which is needed for the process to work. They have it enabled, but any sort of troubleshooting request is met with a "We don't support the WebDAV protocol," meaning all that nasty, angry, WebDAV-troubled traffic comes my way. Blech! No thank you.

What am I, a WebDAV protocol expert now?

Another big limitation of the service has historically been that the calendar is not a two-way sync. This has had to do mainly with how iCal and WebDAV work together, I think, though I don't claim to understand it fully. Suffice to say that, using Tiger's version of iCal and WebDAV for calendar sharing was a one-way affair. That is to say, one computer always acted as the calendar master — the machine that hosted and shared the calendar — and all other machines could only read said calendar. Again, not Box.net's fault. And again, impossible-to-fulfill requests coming my way for the functionality.

But Leopard changed the way iCal works in some significant and incredibly useful ways. When it was announced that Leopard's iCal would support the CalDAV standard, many of us admins were elated. For CalDAV, you see, is a standard that does support two-way calendar sharing natively. Having it in iCal meant it was only a matter of time before two-way calendar sharing became simple and ubiquitous with popular services like, oh, I don't know. Google Calendar!

Yup, that's right. You can now set up Google Calendar to host your iCal calendars via the CalDAV standard. You can then subscribe to these calendars and edit them either from Google, or from any properly set iCal client. Changes made in iCal are instantly propagated to Google and vice-versa.

I tell you, my friend, it is a thing of beauty.

In the old paradigm, your calendars lived on a desktop computer somewhere — or, as in my case, on numerous desktop computers — from where they were controlled. In this brave new world, all my calendars are set up in one single, central location — Google Calendar — and are written to and read from, well, anywhere.

Setting all this up beyond the default calendar provided by Google is a bit of a pain. Google's instructions are as good as I can imagine, so, rather than writing it all out for you, I'll simply link to their page on the matter:

Big Giant Google Calendar Sharing Link

This new functionality, aside from just being plain cool and handy as hell, opens up all sorts of possibilities for sharing amongst other folks — co-workers, family members and the like. Possibilities I haven't even begun to consider. Yet.

I will say, however, that this is still considered beta, and that there are issues particularly with To Dos and Reminders. I'm sure it will become more robust and full-featured soon. But I've been using it for basic calendar sharing for a week or two now and it's been working great at keeping everything in sync. If that's all you need — or if you've been hobbling along with the Box.net trick for the past couple of years like I have — this solution is for you.

A Brief Foray Into Windows

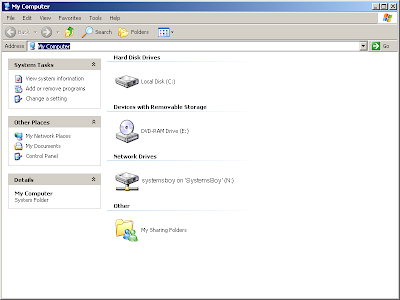
I just had a rare occasion to use a Windows XP machine here in the lab. Oy, was it painful! All I wanted to do was take three simple screen shots — just three — for an instructional article I was writing for our community. It took a half an hour.

I started, of course, by logging in to a Windows box. That went fairly smoothly. Type my name and password, and, sure enough, I get in. So I open a new window by going to the Start menu and clicking "My Computer," although it's not my computer. It's anything but. Still, "My Computer" gets the new window open. I take my first screen shot by hitting the "Print Screen" key. Yes, Windows has a dedicated screen capture key called "Print Screen." Hit it and it sends the entire screen to the clipboard. Not to a file, mind you. To the clipboard. Next you'll need to open up some kind of image editor. I chose the venerable Photoshop CS3. Opened the app, created a new document, and hit control-v to paste my screen grab in. Good (if a bit of a pain in the ass) so far. Next I made some settings in my open window, and made another screen grab. And once more for good measure.

In Photoshop I decided that it would be best to save my files to my centrally-located network home account, so I hit the save button and navigated there, named the file, and... The Save dialog crashed. After waiting about five minutes I decided that the only thing to do was to force quit Photoshop, which I did, losing all my screen grabs and necessitating beginning the entire process anew.

Windows XP: Definitely Not My Computer (click image for larger view)

The next time around I saved each of my screen captures locally as I went, and that seemed to go okay. Next I just wanted to copy these documents to my network account so I could access them from my office Mac, but the copy failed, producing a meaningless error message. Looking through my files, however, it was clear what the problem was. Apparently, during the crash Photoshop had spewed about three thousand temp files all over my home account, and these needed to be deleted before Windows would copy anything over.

So, I began the process of deleting these three thousand or so files by selecting about six hundred of them and hitting the delete key. I kind of like that Windows' delete key actually deletes stuff. That's a nice touch. What I didn't like was that deleting 600 zero byte files was going to take four minutes. But what was I to do? I went ahead with the file deletion. Four minutes of sitting and watching that miserable, 8-bit trash deletion progress bar — you know, the one where the trash files fly through the air and dissipate in a big pink sparkle — is enough to turn just about anyone's brain to mush. Which is probably why, after it was all over I went ahead and switched to list view (though there seems to be no way to make this setting stick across windows) and selected the remaining 2400-or-so files, right-clicked and hit delete.

Eleven minutes?! Argh!

With some time to kill I decided to log in to an adjacent Mac. Once logged in the Windows brain-fog cleared and it dawned on me: I could just delete the files from the Mac! And it won't take eleven frickin' minutes!

And by golly, that's just what I did.

Eleven seconds later I was able to copy up my files from Windows to my network account and get on with my life.

When I think of how easy all that would have been on a Mac I'm appalled. Absolutely appalled. Windows is ugly, flimsy and crash-prone by comparison. And the user experience is dead-awful. It's no wonder I avoid it like the plague.

God help the Windows Admins! You have my pity.

Time Machine After Logout

I've been using Time Machine for a while now. And I've noticed some interesting things about its behavior. Of particular note, I've noticed that Time Machine does not back up your data when you are logged out. I found this strange until I figured out why this is the case.

I first noticed Time Machine not backing up logged-out users after setting up the staff computers here at work. Oddly, my work computer did back up when I was logged out, which I realized when I noticed a backup failure due lack of drive space. According to the Console logs this backup attempt had occurred in the middle of the night. Clearly Time Machine was able to backup when users were logged out, but it would only do so on my machine. So what was the difference?

By default, Mac OS X wisely un-mounts external volumes when a user logs out. This makes sense for a number of reasons, not the least of which is the fact that it's what users expect, and it's the least likely to break something if a user logs out and pulls their firewire plug without ejecting their disk. It's a very sane default that errs on the side of data protection. But it's not always what you want. For instance, say you have network shares, like external RAID drives, that are connected via firewire (which, in fact, we do). Or say your network backups that run in the middle of night get stored on a firewire volume (which ours do). If you want these drives constantly available you need to be able to keep them mounted even when no user is logged in. Fortunately, Apple provides a method for doing this, though it's by no means obvious.

The trick to keeping external drives mounted after a logout lies in a little .plist file. The name of this file is autodiskmount.plist, and it does not exist by default; you have to make it. In the file should be the following text:

<?xml version="1.0" encoding="UTF-8"?>

<!DOCTYPE plist PUBLIC "-//Apple Computer//DTD PLIST 1.0//EN" "http://www.apple.com/DTDs/PropertyList-1.0.dtd">

<plist version="1.0">

<dict>

<key>AutomountDisksWithoutUserLogin</key>

<true/>

</dict>

</plist>

Put this file in:

/Library/Preferences/SystemConfiguration/

And reboot. (Yes, reboot.)

Now all external drives (firewire, USB, eSATA, etc.) will stay mounted after a logout. If they're shared, they'll always be available. And they'll always be available to Time Machine.

So the difference between the staff machines and mine? My computer is set to never unmount drives at logout. Apparently, Time Machine is perfectly capable of running even when no one is logged in. But it obviously needs the Time Machine drive available to do so. Keeping firewire drives mounted post-logout will allow Time Machine to work all night long. Sweet!

And since I'm so crazy with the Installer Packages these days, I'm including one here that will install the necessary preference file to make all this happen. You know, just to make your lives a little easier.

Download KeepExternalDisksMounted

You're welcome!

UPDATE 1: A reader asked in the comments how I came to have the preference file installed on my system. I'd put it there long ago because I needed firewire drives mounted for rsync backups of staff machines. But I certainly didn't figure out how to create that file myself. Credit for that goes to this Mac OS X Hints hint. It's got all the details if you're interested.

UPDATE 2: One other thing I forgot to mention: Why is this useful? I mean, if you're logged out you're not really capable of creating any new data, so there's nothing really new to backup anyway, right? This is mostly true, indeed. But imagine your boss uses Time Machine for his hourly backups. Now imagine he creates a whole buttload of data — I don't know, emails to the CEO, photos of his kids, whatever — and he creates this data right before he leaves for the day. Then, safe in the knowledge that Time Machine's got his back, he logs out and goes home for the weekend. That weekend there's a power surge or something, and his machine is fried. "No problem," he thinks, "I have my backup." But his most recent data is gone. His photos, his draft to the CEO, gone. And guess who's to blame? Yup. The Systems Admin. Your ass is grass, and Time Machine is the lawn mower. (Uh, this is why I don't write in the mornings.)

Personally, I think it would be smart if Time Machine asked you at logout if you'd like to make a backup, or at least warned you that backups would not be performed after logout. This seems like a bit of an oversight on Apple's part.

The other time this can be useful is when you're creating your first backup. This is typically a lot of data. Here in the office we told folks to let it run overnight. But they couldn't log out. So we dropped them to the Login Window with Fast User Switching. Still, it would have been that much more intuitive if we'd just told them to log out like they always do, and that their backups would be ready in the morning.

So yeah, not earth-shattering, but still potentially useful. And interesting on an academic level to know that Time Machine will run sans login.

I have to go install that preference file on my staff machines now. Bye!

NetBoot Part 5

So far this NetBoot/NetInstall thing is working out a thousand times better than I ever thought it would. I wish I'd done this years ago. Not only does it save time, it also reduces errors. This is often one of the most overlooked features of automating a process: the less human interaction in the process, the fewer mistakes can be made. I have only to compare the set of instructions I gave to last year's crew for building a new system to the instructions for using the new NetInstall system to see evidence of this truism. The list of human actions to take — and, thus, potentially screw up — is significantly shorter using the new process. And that's a beautiful thing.

At this point I've converted about half the staff to Leopard with the NetInstall system, and for the most part it's been quick and painless for both me and them. Contrast with years past, where upgrading staff computers — which are both the most customized, and the most important to preserve the data of — has been fraught with tension and minor hiccups. This year I almost feel like I've forgotten something, it's been so easy. But staff would surely let me know if there were problems. (I'm so knocking wood right now.)

I've also had an opportunity to test building multiple machines simultaneously. Yesterday I built five Macs at the same time, and, amazingly, all five built in about the same time it takes to build one — about a half an hour. I'm astounded. We should be able to build our new lab workstations this summer in a day. And still have time for a long lunch. And for the most part I'll be able to offload that job to my assistants.

As I finish up the system, I've realized some things. First of all, it sort of reminds me of software development — or at least what I imagine software development to be like — because I'm building little tiny components that all add up to a big giant working whole. Also, as I write components, I find myself able to reuse them, or repurpose them for certain, specific scenarios. So, in a sense, the more I build, the easier the building becomes, as I imagine is true in software development. Organization is also key. I find myself with two repositories: one contains the "build versions" — all the resources needed to build the packages — and one contains the finished products — the packages themselves — organized into something resembling the physical organization (packages for staff computers in one area, packages for workstations in another, for instance). It's shockingly fascinating to work on something like this, something that's built from tiny building blocks and that relies very heavily on good organization. I'm really enjoying it so far, and I'm a little sad that the groundwork is built and it's nearly done. There's just something fundamentally satisfying about building a solid infrastructure. I guess that's just something I innately like about my job.

The next step in this process, as I've alluded, will be to do a major build, i.e. our new batch of workstations when they come in the summer, and an update of all our existing computers — all-in-all about 40 machines. Between now and then there are sure to be some updates, so I'll probably update my base config before we do the rest of the lab. And then will come the fun. I will report back with all the juicy details when that happens, in what will probably be the final installment of this series.

See you in summertime!

NetBoot Part 4

So this is going great. I have a really solid Base OS Install, and a whole buttload of packages now. Packages that set everything from network settings to custom and specialized users. I can build a typical system in about 45 minutes, and I can do most of the building from my office (or any other computer in the lab that has ARD installed).

I'm also getting fairly adept at making packages. A good many of my packages are just scripts that make settings to the system, so I'm getting pretty handy with the bash and quite intimate with dscl. But, perhaps most importantly, I'm learning how to make all sorts of settings in Leopard via the command-line that I never knew how to do.

The toughest one so far has been file sharing. In our lab we share all our Work partitions to the entire internal network over AFP and SMB. In the past we used SharePoints to modify the NetInfo database to do so, but this functionality has all been moved over to Directory Services. To complicate matters, SAMBA no longer relies simply on standard SMB configuration files in standard locations, and the starting and stopping of the SMB daemon is handled completely by launchd. So figuring this all out has been a headache. But I think I've got it!

Setting Up AFP

Our first step in this process is setting up the share point for AFP (AppleFileshareProtocol) sharing. This wasn't terribly difficult to figure out, especially now that I've been using Directory Services to create new users. To create an AFP share in Leopard, you use dscl. Once you grok the syntax of dscl it's fairly easy to use. It basically goes like this:

command node -action Data/Source value

The "Data Source" is the thing you're actually operating on. I like to think of it as a plist entry in the database — like a hierarchically structured file — which it basically is, or sometimes I envision the old-style NetInfo structures. To get the needed values for my new share, I used dscl to look at a test share I'd created in the Sharing Preferences:

dscl . -read SharePoints/TEST

The output looked like this:

dsAttrTypeNative:afp_guestaccess: 1

dsAttrTypeNative:afp_name: TEST

dsAttrTypeNative:afp_shared: 1

dsAttrTypeNative:directory_path: /Volumes/TEST

dsAttrTypeNative:ftp_name: TEST

dsAttrTypeNative:sharepoint_group_id: XXXXXXXX-XXXX-XXXX-XXXX-XXXXXXXXXXX

dsAttrTypeNative:smb_createmask: 644

dsAttrTypeNative:smb_directorymask: 755

dsAttrTypeNative:smb_guestaccess: 1

dsAttrTypeNative:smb_name: TEST

dsAttrTypeNative:smb_shared: 1

AppleMetaNodeLocation: /Local/Default

RecordName: TEST

RecordType: dsRecTypeStandard:SharePoints

Okay. So I needed to use dscl to create a record in the SharePoints data source with all these values. Fortunately, the "sharepoint_group_id" is not required for the share to work, because I'm not yet sure how to generate that number. But create the share with all the other values and you should be okay:

sudo dscl . -create SharePoints/my-share

sudo dscl . -create SharePoints/my-share afp_guestaccess 1

sudo dscl . -create SharePoints/my-share afp_name My-Share

sudo dscl . -create SharePoints/my-share afp_shared 1

sudo dscl . -create SharePoints/my-share directory_path /Volumes/HardDrive

sudo dscl . -create SharePoints/my-share ftp_name my-share

sudo dscl . -create SharePoints/my-share smb_createmask 644

sudo dscl . -create SharePoints/my-share smb_directorymask 755

sudo dscl . -create SharePoints/my-share smb_guestaccess 1

sudo dscl . -create SharePoints/my-share smb_name my-share

sudo dscl . -create SharePoints/my-share smb_shared 1

This series of commands will create a share called "My-Share" out of the drive called "HardDrive."

After modifying the Directory Services database, it's always smart to restart it:

sudo killall DirectoryService

And we need to make sure AFP is running by starting the daemon and reloading the associated Launch Daemons:

sudo AppleFileServer

sudo launchctl unload /System/Library/LaunchDaemons/com.apple.AppleFileServer.plist

sudo launchctl load -F /System/Library/LaunchDaemons/com.apple.AppleFileServer.plist

Not the easiest process, but not too bad. SMB was much tougher to figure out.

Setting Up SMB

Setting up SMB works similarly, but everything is in a completely different and not-necessarily standard place. To wit, Leopard has two different smb.conf files: one that's auto-generated (and which you should not touch) in /var/db, and one in the standard /etc location. Fortunately, it turned out, I didn't have to modify either of these. But still, it led to some confusion. The way SMB is managed in Leopard is rather roundabout and interdependent. Information about SMB share is stored in flat files — one per share — in /var/samba/shares. So, to create our "my-share" share, we need a file named for the share (but all lower-case):

sudo touch /var/samba/shares/my-share

And in that file we need some basic SMB info to describe the share:

#VERSION 3

path=/Volumes/HardDrive

comment=HardDrive

usershare_acl=S-1-1-0:F

guest ok=yes

directory mask=755

create mask=644

Next — and this was the tough part to figure out — we need to modify one, single, very important preference file that basically informs Launch Services that SMB should now be running:

sudo defaults write /Library/Preferences/SystemConfiguration/com.apple.smb.server "EnabledServices" '(disk)'

This command modifies the file com.apple.smb.server.plist in our /Library/Preferences/SystemConfiguration folder. That file is watched by launchd such that when it is modified thusly, launchd knows to start and run the smbd daemon in the appropriate fashion. Still, for good measure, I like to reload the LaunchDaemon for the SMB server by hand. Don't need to, but it's a nice idea:

sudo launchctl unload /System/Library/LaunchDaemons/com.apple.smb.server.preferences.plist

sudo launchctl load -F /System/Library/LaunchDaemons/com.apple.smb.server.preferences.plist

That's pretty much it! There are a few oddities: For one, the new share will not initially appear in the Sharing Preferences pane, nor will the Finder show it as a Shared Folder when you open the window.

Shared Folder: This Won't Show Without a Reboot

(click image for larger view)

But the share will be active, and all will be right with the world after a simple reboot. (Isn't it always!) Also, if you haven't done it already, you may have to set permissions on your share using chmod in order for anyone to see it.

I was kind of surprised at how hard it was to set up file sharing via the command-line. But I'm glad I stuck with it and figured it out. It's good knowledge to have.

Hopefully someone else will find it useful as well.