Satellite Home Directories

There are three basic methods in use today for hosting home accounts on networks in such a way that users have a single home account that follows them from computer to computer, giving them the same environment no matter where they log in. None of these three strategies works in a way that reflects how most people in the lab I currently work in — nor many of the labs I've freelanced for — use their computers and access their data. So I'd like to propose a third strategy that does.

Let's start with a rundown of the existing approaches.

Roaming Profiles

The approach Windows computers use is called Roaming Profiles. The way Roaming Profiles work is pretty simple. Users' home account data is stored on a centralizd server. When the user logs in to a client system her data is downloaded from the server to the client machine. She will access her data locally for the duration of the session. When she logs out the data will be synced back up to the server. The advantage of this approach is that the user has local access to her data and isn't beholden to the network while actually working. This makes data access generally faster and more reliable. The big disadvantage here is that if the user makes any big changes or creates any big files, a large data transfer will happen at log out, and then again at login to subsequent machines that aren't yet synced to the server. This both slows down the login/logout process and places an often undue burden on the network.

Because of the sorts of environments I tend to work in — data-intensive, video and image oriented facilities that create a lot of data — my experience with Roaming Profiles has been fairly poor. For my uses they've required a lot of management and have been somewhat unreliable. But, for the purpose of maintaining a user environment across multiple networked systems, they work well enough if you understand and plan for their inherent limitations.

Network Home Accounts

The method used by *NIX systems, Mac OS X included, for time in memorial, is generally referred to these days as Network Home Accounts. In the Network Home Account model, as with Roaming Profiles, the user's home account data is stored on a server. But when the user logs in using Network Home Accounts no data transfer occurs. Instead, the home account data is accessed directly from the server: new files are written directly to the server; settings files are read directly from the server; everything happens over the network and the network share that contains the user's home account data is treated just like a local volume. The speed advantage over Roaming Profiles at login and logout is obvious; there's simply no lag time as data gets transferred between the client and the server, because there simply is no data transfer. On the other hand, accessing your entire home account over the network can be slower than a local account even on the speediest of networks. And on slower networks, or networks with a great deal of traffic, you'll definitely notice the slowdown. There are also potential problems due to the constant reliance on the network and server. If the network becomes congested or the share becomes unavailable even for a second you're liable to feel the pain. If either goes down you're dead in the water until they've returned to service.

As network home account models go, I like this one the best. I've used it a great deal in educational settings in which resources are almost completely shared and it's fairly reliable and usable. But even this model can be frustrating and is less than ideal when compared to working from a local home account.

Portable Home Directories

The final model is called Portable Home Directories. Devised by Apple for laptop computers with occasional — but not constant — access to the network hosting home account data, Portable Home Directories attempts to combine the best of the Roaming Profile and Network Home models by providing finer-grained control over the sync process in what is otherwise a Roaming Profile approach. So, Portable Homes sync to specific data at specified times when they're on the network. Fine-grained control over what is synced and when is intended to mitigate performance issues at login and logout.

My main problem with this approach is that, in my admittedly limited tests, it doesn't seem to work very well. I also don't like the level of management required. The other models, once set, require little if any tweaking whatsoever. But I could see spending a great deal of time and effort getting my Portable Home Directory settings just so.

The Problem

But my overarching beef with all these models is that they don't really jive with the way most people in most of the environments I've encountered actually use their computers. This makes them use system resources less efficiently and yields a poorer user experience than if they did.

So how do most people work? Well, what I've tended to see in the media-based environments in which I've worked is that users are generally assigned a single computer. It's this computer from which they work almost all the time. Indeed, this is how I work in my current job. I'm almost always working from the computer in my cubicle. Almost.

Every now and then, however, I need to work from a different machine, and there are often times when I'm doing this that I realize that it would be extremely handy to have my entire home account — all my environment settings, files and folders — available to me on this other machine. But I don't. They're over there, on my cubicle machine. If only I could use the home account on my main computer directly, as thought it were a Network Home Account.

And this is the basic idea behind Satellite Home Accounts.

Satellite Home Directories

All the current models rely on the user's data being stored on and accessed from a centralized server. But why? Why can't the server be the user's main computer? In the Satellite Home Account model, the user's primary computer becomes the home account server for any user that sets her account as a Satellite Home Directory.

The way I envision it, it would actually be quite simple to set up. In the Accounts preference for the user would a be a tickbox to activate Satellite Home Directories. Once activated, the user's system would begin broadcasting Satellite Home Directory information, just like Mac OS X broadcasts Network Home Account info. The user would then work locally as normal, but when logging into another system on the network — a system that's listening for SHDs — the user would be presented with her home account over the network, shared directly from her primary system rather than from a centralized server. Simple.

Among the great benefits of this system are its simplicity and the fact that it requires no server. But the chief advantage comes from the fact that the Satellite Home Directory system works the way users tend to work. When you're on your main computer, which you are 99% of the time, you get a fast, responsive, local home account. When you move temporarily to another system, your environment follows you. It's a bit slower, sure. But hey, it's only temporary. The network overhead is significantly reduced from the other methods, and the user experience is also enhanced. It's win-win.

There's certainly no technical reason an implementation like this would be impossible or even particularly difficult. Most of the technology already exists, either in Mac OS X client or Server. All we need is for someone to program it. And while I doubt there's likely much interest on Apple's part to build something like this, I really think it'd be damn sweet.

And a boy can dream, can't he?

Why We Tell You To Reboot

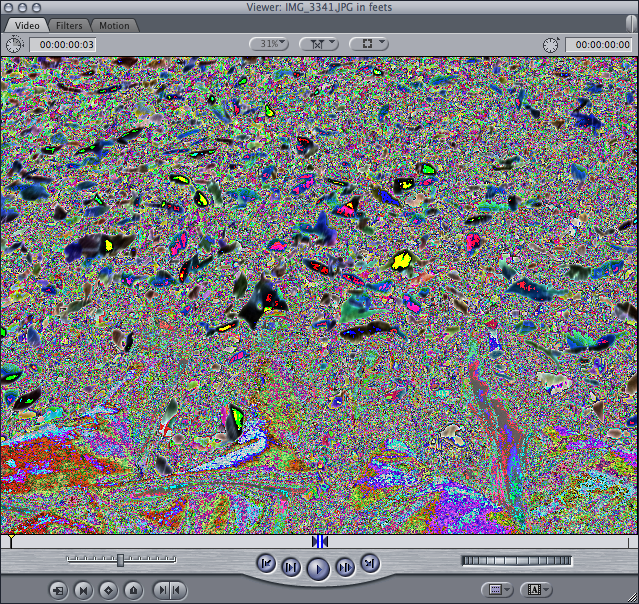
This is how still images in Final Cut Pro 7 looked to me after installing and updating to the latest version (7.0.1):

Final Cut 7 Garbled Image Display

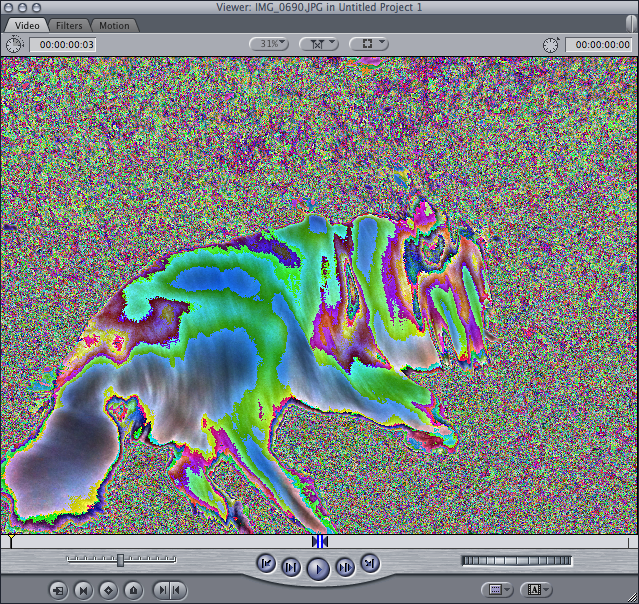
This is my dog:

Garbled Dog

She is not normally purple and green and swirly colored.

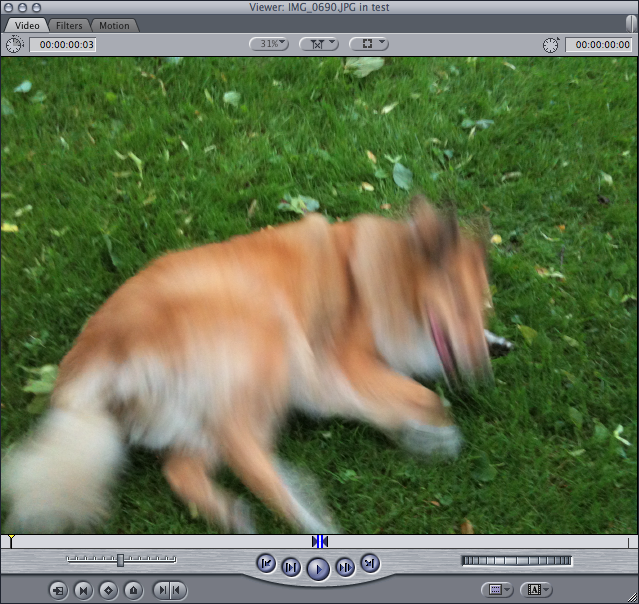
After an hour or so mucking about, reinstalling the application, trashing prefs and otherwise performing the usual maneuvers, I decided to take my own medicine and reboot. Why I don't just always do this first — like I tell everyone else to do — is beyond me. But sure enough, it worked.

Normal Dog

Ah! That's better! Crazy mutt!

Create a Dual-Format Drive for Mac and Windows

It's just come to my attention that it's now fairly trivial to split a drive into two differently formatted partitions, one of which could be used for the Mac while the other could be used for Windows. This is not necessarily new, but there are a number of things that make it of particular interest to me. Before I detail the process of creating this dual-platform drive, I want to talk a bit about some of the reasons you might want to do this and some of the challenges I've faced over the years with regards to the issue of cross-platform drives.

Some History

In the very cross-platform lab where I used to work we were continually on the hunt for the best filesystem solution for users of multiple platforms when they were using external firewire or USB drives. That is, some folks wanted their drives to be accessible from both the Mac OS and Windows. On the surface this can seem like an easy problem to solve — Fat32 (or "MS-DOS" as it's called in Disk Utility) is readable and writable on both platforms. But it's not so cut and dry.

The biggest problem for me was video. See, I taught — and continue to teach — a video class in that very same department. We use Final Cut Pro as our editing software, for a variety of reasons, not the least of which is the fact that I prefer to work on the Mac. I require my students to have a firewire drive appropriate to showing in-progress video work in class. But Fat32 has a 4GB file size limit, and video captures can often exceed that limit. What happens when this limit is exceeded is interesting from a systems standpoint, but devastating from a user standpoint.

Video and Fat32

When capturing video in Final Cut Pro to a Fat32 volume, what happens is that the video file gets segmented. That is, the capture file gets written in 4GB chunks. Initially, Final Cut will see these chunks and understand what they are. But after saving the project and quitting the app Final Cut will no longer be able to locate the captured media because it's in multiple files with different names. The path to the media that FCP relies on is now, essentially, broken. This actually happened to a student of mine some time ago, and we were able to use the cat command to reconstruct the single movie file onto an HFS+ volume and then point FCP at the reconstructed file. Boy was that fun.

NTFS

We've often looked to the ever-popular NTFS file system as a possible future solution. It does not have such small file size limits, and it's readable on Mac and Windows. But the Mac has never been able to write to NTFS. So, in the past, our solution in the lab — our recommendation for users who really needed a dual-format drive with read/write capabilities on Mac and Windows — was to use the HFS+ filesystem on the drive and use MacDrive on Windows to read and write to that drive. Inelegant? Yes. But it mostly worked.

Mac and Windows Partitions

Another potentially attractive alternative to a single, dual-platform volume was the idea of splitting the drive into two partitions and dedicating each partition to a platform/filesystem. This way, even if all your Mac and Windows data wasn't all mushed together in one volume, you could at least keep it all on one device. This solution would likely work for the vast majority of users. Unfortunately, there was never a particularly straightforward way of doing this. Sure, it was doable. But it wasn't easy, and it wasn't something you could tell new students to do. In fact, it was likely to require admin access and command-line heroics, and so just wasn't a viable solution to anyone but the most die-hard user. Until now.

Without too much mucking around, it's now possible to create a dual-format external drive that contains a mac-formatted partition and a Windows-formatted one.

MacFUSE and NTFS for Mac OS X

The first step is the only really tricky part, and it's not even that tricky. If you have need for a dual-format drive, this should be pretty easy for you. You're going to need to install the MacFUSE and NTFS packages. In a nutshell, MacFUSE is an experimental set of tools for doing unsupported things with filesystems like SSH, FTP and, of course, NTFS on your Mac. And, experimental though it may be, I've been using it for quite a while and have not had any problems to speak of. Installing MacFUSE and the NTFS drivers will allow you to mount NTFS volumes with read-write access.

MacFUSE

So, if NTFS can be mounted read-write on the Mac with MacFUSE, and it's obviously read-write on Windows, and it doesn't suffer from the file size limitations of Fat32, why not just use NTFS as your über-filesystem and format the whole drive with it? That's a great question, and I'm glad I asked it!

The thing about getting NTFS read-write access on a Mac with MaFUSE is that it's very much a hack. Yes, it works, but it has its problems. First and foremost among them is the fact that Final Cut Pro is really not a fan. In fact, FCP might just be the best barometer of a good cross-platform solution as it seems to be so picky about filesystems. So far, the only filesystem I've seen work consistently well with Final Cut is HFS+. No surprise there. And on NTFS it gets downright crazy. Files sometimes won't open. Sometimes they won't save. It's a scary mess, and I wouldn't trust my FCP data on NTFS for any amount of money.

But, what the MacFUSE NTFS package does get you is a relatively easy way to format your drive with separate Mac and Windows partitions, and this, at least in my tests seems to work just fine.

NTFS-3G for Mac OS X

The easiest way to get everything you need is to go to the NTFS-3G for Mac OS X website and download the latest package. This package will install the most recent non-beta version of MacFUSE as well as the latest NTFS libraries, and contains everything you need. Once you've installed this bundle, you'll need to reboot your system.

Creating the Dual-Partition Drive

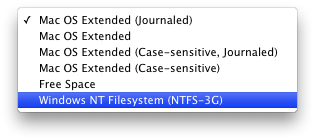
After the reboot you'll see a new filesystem option when you go to format drives in Disk Utility.

A New Option

Moreover, that option will be available to individual partitions of drives that are otherwise formatted. And that's what's new (to me) and what allows the magic to happen. Here's how you do it.

  1. First, if you have any data on the drive that you need to preserve, back it up. This process WILL ERASE YOUR HARD DRIVE.
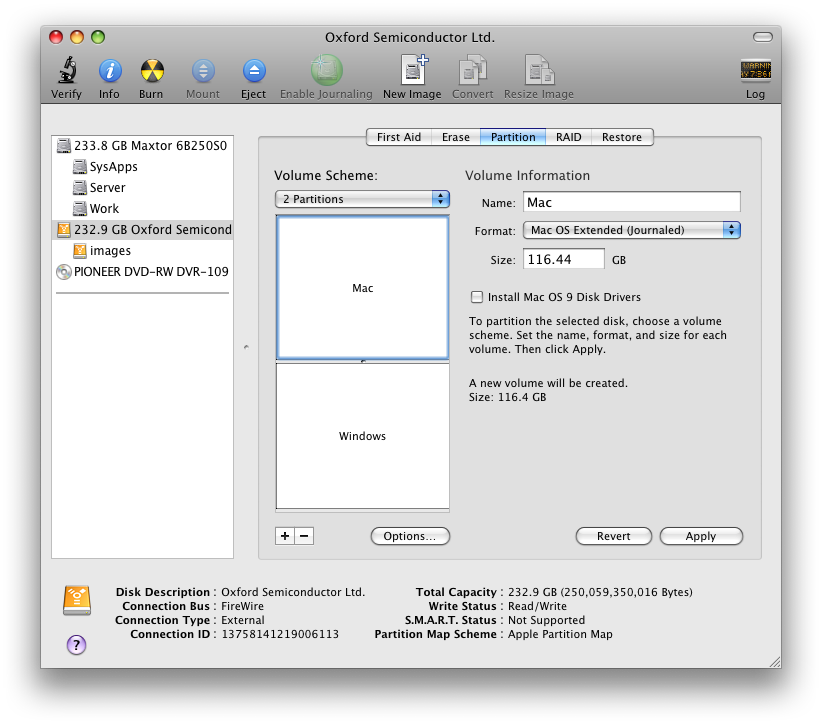
  2. Next, select the drive you want to dual-format and choose the Partition tab.
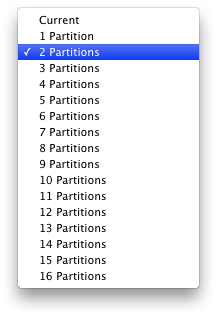
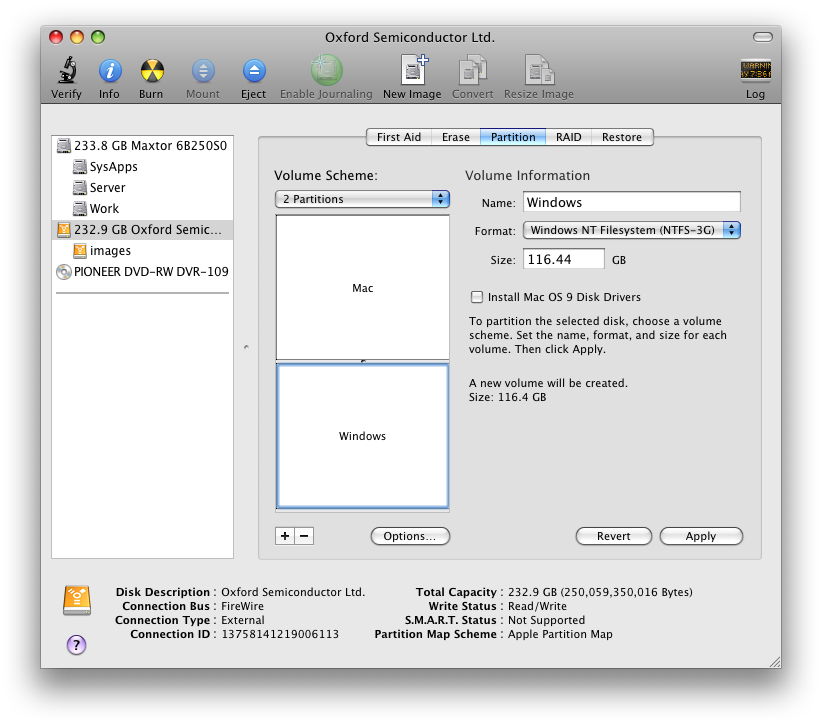
  3. Select a Volume Scheme. I'm just doing the simplest, two-partition scheme, with one Mac and one Windows partition, but you can certainly get more Byzantine with it if you'd like.

    Volume Scheme

  4. Set the Format for the partition you want to use on the Mac to "Mac OS Extended (Journaled)," give it a name and a size.

    Mac Partition

  5. Set the Format for the partition you want to use on Windows to "Windows NT Filesystem (NTFS-3G)," give it a name and size.

    Windows Partition

  6. Under the Options... set the partition scheme to "Master Boot Record." This is needed for Windows to see your drive.

    Partition Scheme

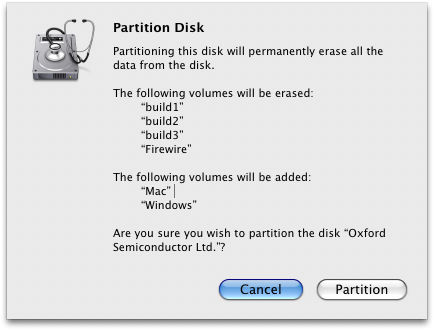
  7. Finally, hit the Apply button. You'll be warned that everything is about to be deleted. Click through, and after a few seconds you will have completed the formatting process and your dual-format drive will be ready for use on Mac and Windows.

Caveats

As I said, so far this has been working really well for my class. You may still want to file it under "experimental" for the time being, at least until you're sure it's working safely. But I'm confident enough in this method to recommend it to my video students who also need some external Windows drive love.

It's also important to keep in mind here that I am not endorsing using the NTFS partition for Mac data of any kind. Doing so is surely unsupported by Apple, and by all reports is fraught with problems.

The other thing to keep in mind is that, unlike with a GUID partition table, you will not be able to resize or split partitions without completely erasing the drive.

Erases Everything

Conclusion

Lastly, I realize that this process is hardly new, nor am I the first to discover it. It was pointed out to me by one of my video students, and I have a feeling the new admins at my old job have been using it for some time. But it's new to me. This is the first I've heard of this and it's exciting to me from an academic standpoint, in the context of my old job, in the context of my class, as a new option I can offer to whomever might need it, and as a symbol of progress — however small or kludgy — towards cross-platform filesystem solutions. This is just another of the very cool advances made possible by the existence of the MacFUSE (and the original Linux FUSE) effort. It's very cool to see this sort of thing coming to fruition at last!

Another intriguing extension of the MacFUSE project — and one that I've used a bit myself — is MacFusion, which allows for mounting of data over network protocols such as FTP and SSH. I'm sure there are tons of others. I highly recommend folks — particularly SysAdmins — check out and familiarize themselves with MacFUSE in general, as well. As much as has been done since the last time I looked at it, there is still a ton of future potential in the project, and I see it increasingly becoming a part of the admin's toolbox.

Archives

Let's face it, my data is everywhere. I have drives all over the place for various and sundry purposes. Some are full. Some aren't. I also have a folder for things I plan on trashing eventually, when I need to reclaim some space, but want to keep around just in case, called TrashMe. And I have a folder with items I plan on backing up some day called BurnMe. This name comes from the fact that traditionally I archived up my data to optical media: either DVDs, or, in the distant past, CDs, so I also have several containers full of optical media.

This isn't working for me anymore.

Optical media is no fun to use for backups. It's slow, requires keeping a stock of media on hand, and it's often undersized for today's hefty data needs. For instance, backing up my current BurnMe folder will require about fourteen DVD-R discs. Burning and verifying those DVDs will take as many if not more hours. And then it will all need to be cataloged somehow, which is also a lengthy process. Finally, retrieval is almost as slow and tedious: find the disc you need in the catalog, get it from storage, load the disc up and copy the data back to the computer, which can also take quite some time. And if, heaven help you, there's one tiny scratch on that disc you could lose all that data.

So I'm switching to a better way: hard drives.

1-machd

One of the best bangs for your buck per-gigabyte of storage is, of course, the hard drive. In addition to being cost-effective, they're fast, they hold a lot of data, they're read-write and extremely versatile. You can use them internally, depending on the drive and computer in question, of course. Or you can use them externally in any number of ways, the most obvious being in a firewire or USB case. Using such a case allows for the attachment of the drive to just about any computer you can get your hands on. Drives don't require much physical space, and because they're so fast, they're quick and easy to catalog and restore from. In fact, using hard drives as an archive solution entails little difference from accessing local storage. The hardest part is getting the drive off the shelf and getting it attached to your machine. But there are hardware solutions to simplify that process as well. Hard drives, which have largely remained the same since I began working in this business ten years ago, are more future-proof than optical media, which is constantly the subject of format wars and which is often subject to a raft of compatibility issues. Put another way: getting data off a hard drive in the next ten years is more likely to be supported by my current hardware than getting it from a DVD.

So, my plan, going forward, is to use hard drives to archive all non-essential data. I will continue to archive certain critical files to DVD in addition to the hard drive archive. But most of my stuff will be on hard drives. Things like bittorrent backups and movie files, old audio, video and web projects, images and what have you will stay on hard drives earmarked for the archive. Once one of those drives is full and I'm no longer using the data, I'll burn anything critical — finished projects and their assets, for instance — to optical media, catalog the drive with CD Finder or similar software, and then put the drive in a Hudzee and up on the shelf. Done and done!

This greatly speeds and simplifies my archive procedure. And, because of the increased space and time efficiency, I can archive a lot of data I would have thrown out in the past. I still have yet to work out the details of this system, but I think it will be a vast improvement over the old burn-and-catalog weekends of my not-so-distant past.

If anyone has thoughts on how best to archive data I'd love to hear them in the comments.

Installing Firefox On the Mac

Alexander Limi, one of the developers of the fine — and my favorite — browser, Firefox, recently issued a challenge that has been heard by many: how to make application installation more sensible for the less technically advanced. What followed — and, to some extent preceded — was an explosion of discussion on the matter.

It really is somewhat amazing that the preferred method for installing a good deal of Mac software — the so-called "Manual Install" — is one that's liable to be confounding to so many users, particularly given that Apple has gone to such great lengths to simplify software installation. And I agree with much of what I've read on at least one point: The problem is the DMG.

"They drag the application to their dock directly.
This creates a link to the file inside the disk image, which means that every time they try starting Firefox, the disk image is unpacked and mounted, and starting of Firefox becomes very slow, which makes it a bad experience."

It's true; I've seen very computer-savvy users constantly launch Firefox directly from a Dock icon that's linked to the item on the disk image. And there are certainly many users to whom you'll never be able to explain exactly what a disk image is, how it works or why it exists. Frankly, as useful as it is to geeks like you and me, it's kind of a crazy concept for anyone who doesn't care about these sorts of things. And I'm of a mind that most users don't and shouldn't.

That said, our options are limited when it comes to installing software. As Limi points out, most apps these days are actually folders (another conceit most users aren't and shouldn't be aware of), and so they must be installed from some sort of container, particularly if they're coming from the Internet. This can be either a ZIP file or, as is generally the way on the Mac, a DMG. Typically, Apple uses a DMG that contains an Installer package for distributing their own software, probably because their stuff is usually not simple drag-and-drop stuff. They've also created a special "internet-enabled" flag for DMGs that, when applied, will be recognized by Safari, which will proceed to open such DMGs and run any installers contained therein. This, at least, gives us a way to accomplish some of Limi's stated goals for the Firefox installer:

  1. Start the Firefox download.
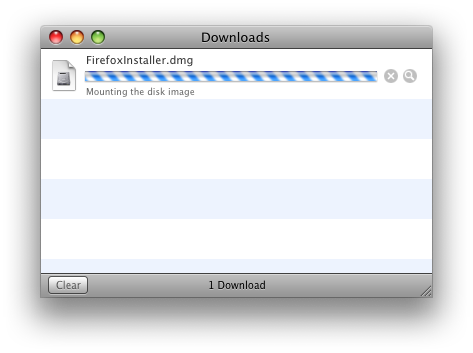
  2. When the download is complete, the disk image will mount automatically (if they were using Safari), and the Firefox installer runs.
  3. The install procedure continues similar to how it happens on Windows.
  4. As the last step of the process, the installer lets you set Firefox as the default browser, and start the application immediately. We have seen users forget that they just installed Firefox if you don’t let them start it at the end of the process, and make that the default choice.

Having some experience with Mac OS X package creation, I decided to see if I could quickly whip something up that met these goals. I believe I have been successful. Here's the installation procedure I've designed:

  1. The user downloads the Firefox Installer from Safari.

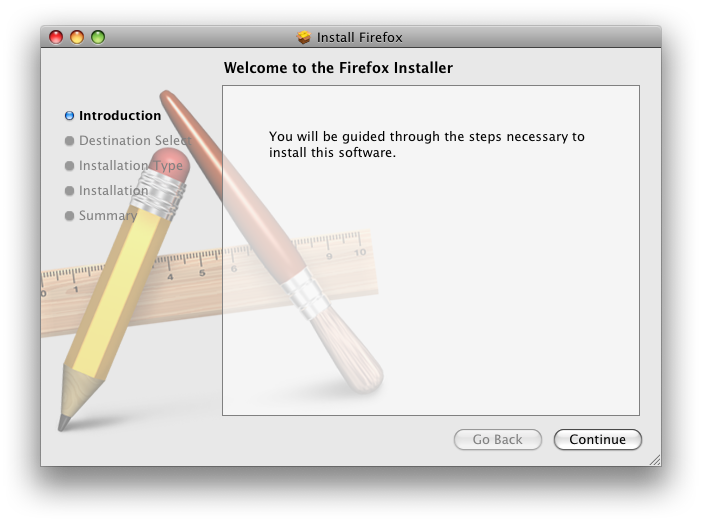
  2. Safari Opens the DMG and runs the Installer.

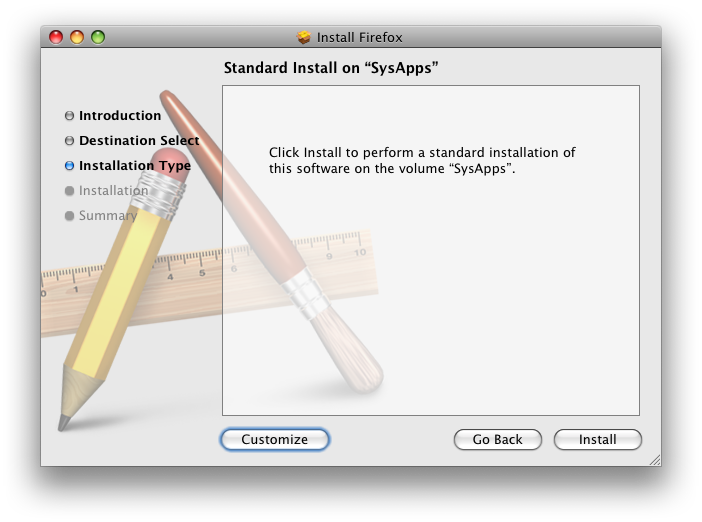
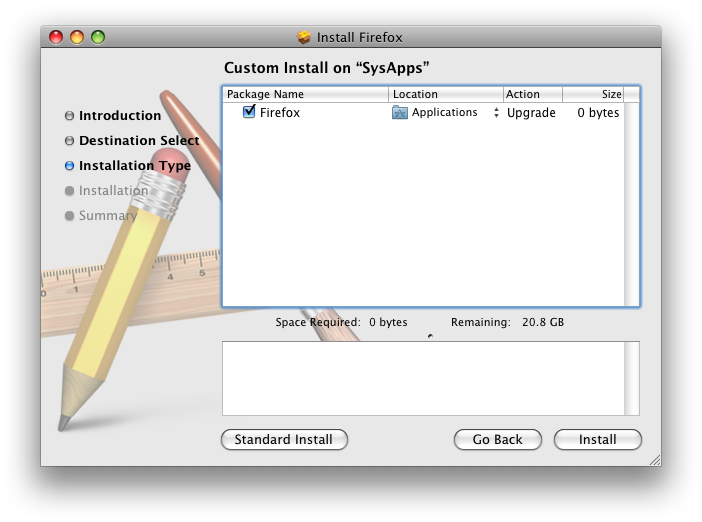
  3. The Installer uses a standard method by default, which requires a minimum of clicks, and installs Firefox in the default location, /Applications.

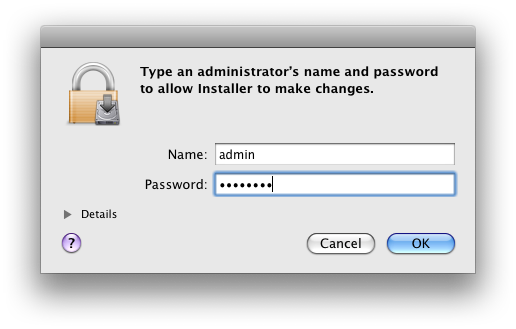
  4. Upon pressing "Install," the Installer requests authentication.

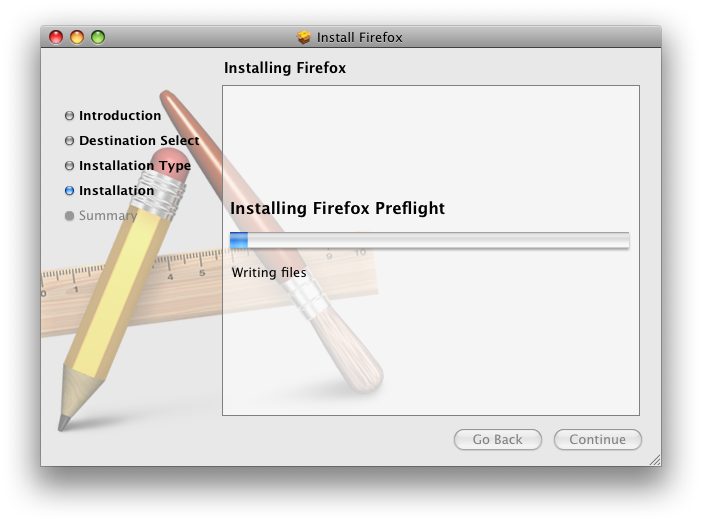
  5. Before proceeding, the Installer's preflight routine quits Firefox if it is already running (this is not necessary, we do it as a precaution).

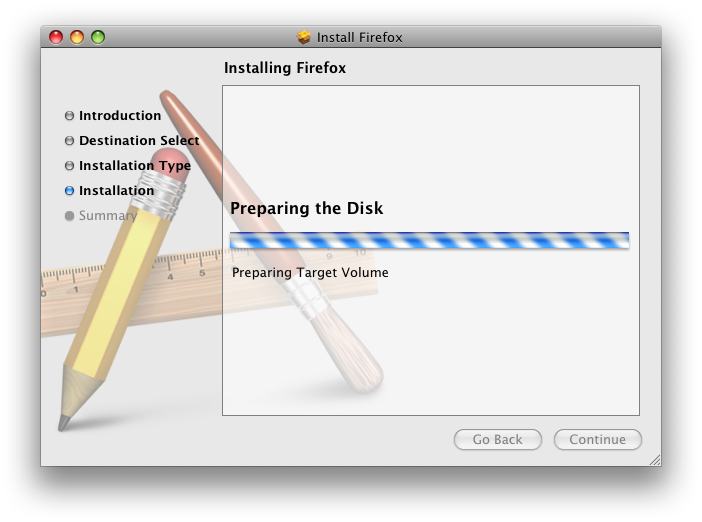
  6. The Installer then proceeds with the installation of the app.

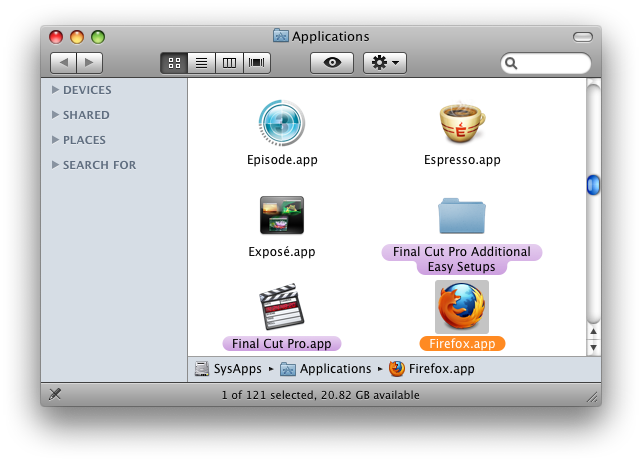
  7. When it has finished it will open the containing folder and highlight Firefox.

  8. And then it will launch the app. If this is the first launch, Firefox will ask the user if she wants to set Firefox as the default.

This is the basic install procedure, but some more advanced users will, of course, want to customize the install location of the app. To that end, the installer I've built also contains a "Customize" option.

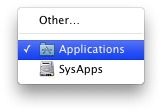
Clicking this will allow the user to customize the install location of the app by selecting "Other" from the Location pull-down.

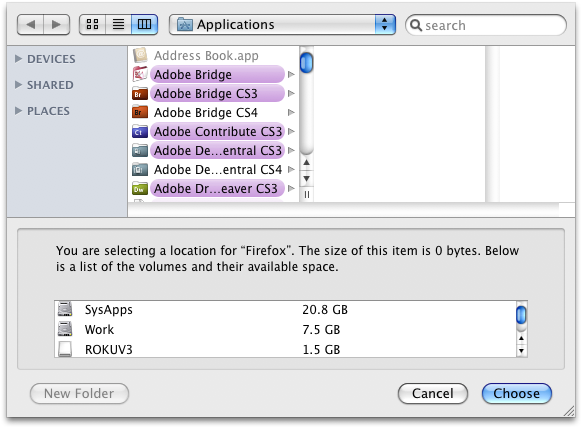
And then choosing the location from the resulting menu.

I believe this method offers the best of all possible worlds given the current state of off-the-shelf installation options for Mac OS X. It offers some level of customization for advanced users, while still offering a guided experience for less Mac- or tech-savvy users. And I believe it fulfills most or all of Limi's stated goals for a Firefox installer. There are even numerous things we can do to further customize this guided experience — things like adding graphics and explanatory text, or running additional pre- and post-flight scripts to perform certain behaviors.

And this will work great for most folks who use Safari as well. But for anything beyond this particular scenario — i.e., anyone trying to install apps from browsers other than Safari, which would be anyone who uses the above method, i.e. Firefox users as well as users of any other browsers — we still have a problem. That problem is DMG behavior. The DMG, despite being immensely useful and a perfectly good application and installer container, once downloaded, is easily forgotten. It's behavior and purpose are arcane to most users. They don't know what to do with it and are confused by its presence. And it has nothing to do with anything normal users think of as "Software Installation."

Some developers have rolled their own solutions to some of these problems. But I think the answer really needs to come from Apple in the form of a unified, internet-savvy Installer format. Something that knows where it comes from and what it's supposed to do, and once downloaded, just does it. Something that developers can all use for any kind of installation, even so-called "simple drag-and-drop." Something that just works, dare I say, at least as well as it does on Windows. Preferably better.

Given the level of abstraction of so many concepts in modern operating systems — applications are folders, disk images are files that can represent volumes, Soylent Green is People — I think drag-and-drop installers are bound to be confusing to many users. The guided experience, while a bit of a bummer for very advanced users, should be the preferred method. And I think the best candidate for improving upon that method is ultimately Apple.

One thing that would help the situation immensely, though, is if browser developers made their apps internet-enabled-DMG-aware, like Safari is. This goes a long way towards mitigating the confusion wrought by the ever-confusing, yet — at least at this point in the game — fairly necessary DMG.