iPhone Hand-Me-Down

When I got my new iPhone 3GS I wondered what to do with the old one. After activating the new phone my 1st Gen was still loaded with all my content, and still functioned like it always did, just without phone functionality. In other words, an old iPhone is still a pretty cool thing to have as a gaming and media device. And someone at work was interested in having just that.

So I'd finally found my old iPhone a good home. But I wanted to erase it and reset everything before I gave it away, just to be on the safe side, and to give its recipient that out-of the-box experience — that new iPhone smell, if you will. I searched like mad on the Internets for the best way to securely erase and reset the phone while still retaining iPod functionality. The questions I had were:

  1. Can I update a deactivated iPhone to OS version 3.0?
  2. Can I erase the iPhone securely?
  3. If I erase the phone, can I still use it as an iPod without setting it up again as a phone with AT&T?

The short answers are: 1) yes; 2) yes; and 3) yes. All good news!

My first concern was upgrading to iPhone OS 3.0. I had forgone doing so on my old phone, which was a bit of an oversight in retrospect. No worries, though. Upgrading the old phone was completely straightforward and didn't break anything. The thing was still working as an iPod, and my new iPhone 3GS was still acting like a phone. So far so good.

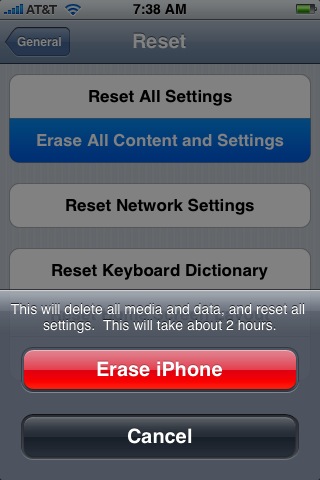
My next concern was erasing the phone, and I wanted to do so as securely as possible without having to jailbreak the thing. iPhone OS 2 and up (from what I've been able to glean) have a function called "Erase all Settings and Media." This can be found in the Settings->General->Reset menu. Running this writes data over the entirety of the iPhone's internal flash storage (again, from what I can glean). It's akin to the Finder's "Secure Empty Trash." Not the most secure deletion, but good enough for most uses.

Erase All Content and Settings

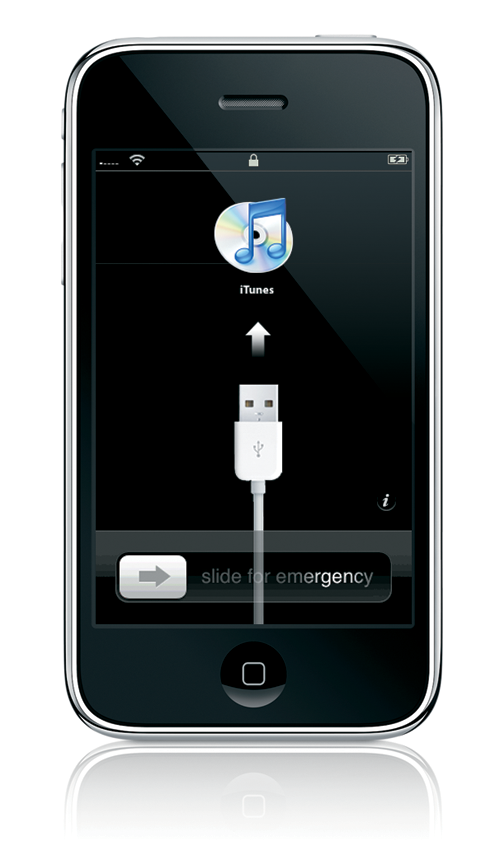
Wiping the phone in this manner took about two hours. What I had when I'd finished was a pristine iPhone, with none of my data, running OS 3.0. But the phone at this point was asking me to connect to iTunes, and I was somewhat worried I'd have to set it up as a phone again in order to use it at all.

iPhone Activation... Sort Of...

At this point iTunes was asking me if I wanted to restore the phone from a backup, or if I wanted to set it up as a new phone. I certainly didn't want to restore the data I'd just erased, and I was a bit hesitant to hit "Set up as new phone" as I didn't want this to become my phone again. I'm fairly sure doing this would set the phone into an non-phone iPod state, but it's not completely clear.

It's New to Me

Not wanting to take the chance, I decided to log in as another user on my system, one that had never seen any of these iPhones, a fresh, clean account. In this fresh account I activated the phone, and after doing so, it was, indeed an iPod only. No phone capabilities were restored.

One last thing: Maybe I'm being paranoid, but I'm keeping my old SIM card. I've popped it out and I'll store it in the iPhone 3GS box. Not sure if I need it, but I know it's required for phone use, and I'd rather not give my co-worker that ability. My understanding is that if you're giving the SIM card away, you should notify AT&T, but I'm not entirely sure why. So I'm forgoing the hassle and boxing the thing. Better safe than sorry.

So, after updating and securely erasing my 1st Gen iPhone it's now ready for retired life. As an iPod.

I'll miss you baby! Be happy!

Gmail Multiple Select

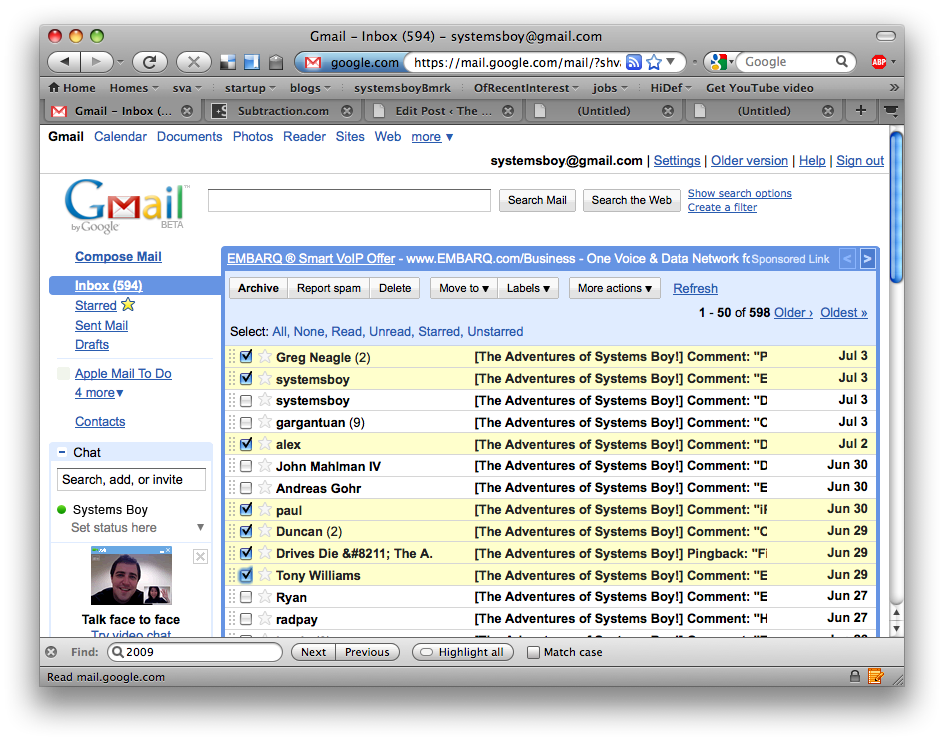
I just discovered this (yes, I am slow): Gmail allows for multiple selection using the same method as the Finder. That is, selecting an email with the email's checkbox and then holding the shift key while ticking another email's checkbox will select a range of emails between the two selections. Very handy!

Shift-Select in Gmail

Call Quality Improvements

A while back I wrote about my initial impressions of my new iPhone 3GS. One of main reasons for upgrading was the touted improved call quality associated with the 3G models, but in my article I lamented that the improvement seemed nominal at best, from my cursory tests. I also noted that this would take some time to suss out for sure.

Louder

Happily, after spending some more time — and more importantly, more talk time — on the phone, I have noticed a subtle but significant improvement. I say subtle because I can't quite put my finger on exactly what's changed. But it's significant because I find myself far less annoyed and far more capable of the sort of long, involved conversations that were driving me stark raving batty on my 1st Generation iPhone. And that's a huge improvement.

This is fantastic, and tops off my list of reasons for upgrading. With this improvement, every major complaint or wish I had regarding my iPhone 1st Gen has been addressed.

I'm pretty happy about this phone!

On Comments

You would probably think that after writing this blog for so many years and dealing with all manner of comment I would be immune to it, but comment snark probably bugs be more now than it ever has. There's something deeply infuriating about someone coming onto my little corner of the Internet and behaving rudely. It's completely uncalled for and lowers the level of discourse for everyone.

Generally speaking, though, commenters here are exceptionally well behaved, and I'm quite proud of the quality of my readership. Even some of my snarkiest commenters have turned out to be really nice guys in the end who are just having a bad day. Guys, I totally get the bad day thing.

But comment snark is my kryptonite!

For whatever reasons, comment snark — and by that I mean condescension, rudeness, or any general lack of graciousness — really gets to me. It ruins my day. Almost as much as good comments can make my day. So, rather than stewing about it every time, I've decided to simply institute a comment policy.

We SysAdmins love ourselves some policy, so I've added a whole page for them called "Policy," and it's here you can find my comment policies. The basic rules are simple, though: keep it polite and civil; snark will be dealt with by me, case-by-case, in whatever manner I see fit. And if you're asking for help, be clear and thorough regarding your issue and what action you'd like taken.

Thanks to everyone who comes here to read and comment on this site. Your readership is hugely appreciated.

OGG Theora Converter

John Gruber today opines that there is no GUI interface for the command-line tool for converting Quicktime movies into the OGG Theora format — a very handy thing to be able to do if you want to serve video to Firefox-type browsers using HTML 5's <video> and <audio> tags.

Since this is something I do a lot — wrap command-line tools in Automator wrappers, that is — I thought I'd whip up a GUI method for doing this. So here it is.

The OGG Theora converter

It's a Finder workflow, so download it, unstuff it and put it in:

~/Library/Workflows/Applications/Finder

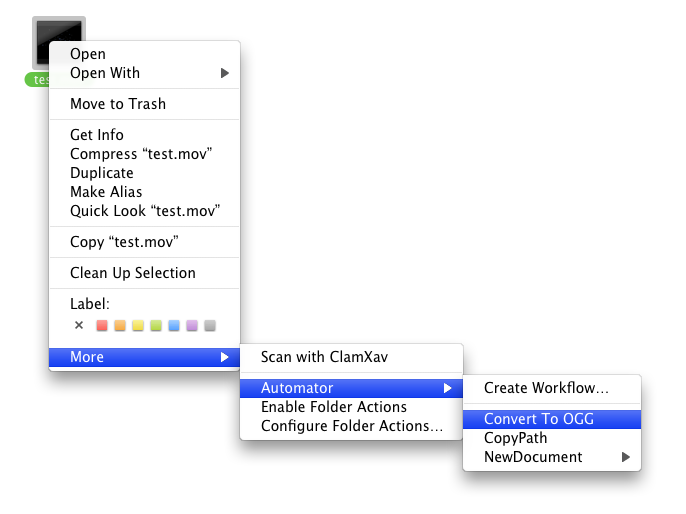
Placing the workflow there will add the item to the Finder's right-click contextual menu. To use the workflow, simply right-click a video you want to convert, navigate to More->Automator and choose "Convert To OGG" from the menu.

Ogg Converter Workflow

While this crunches you'll see a badge in your menubar:

Menubar Progress

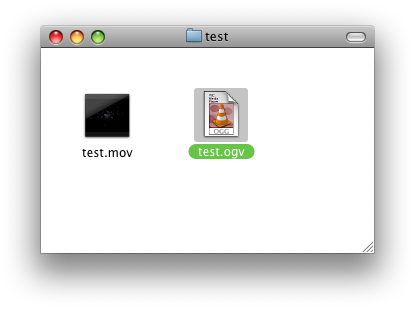
Wait a few minutes and you'll see the OGG version appear right alongside your original movie.

complete

And remember, you must first install the OGG Theora converter tool, ffmpeg2theora, for all this to work.

I've made a droplet-style version of this as well. Place this version anywhere — your Desktop, the Applications folder, your Dock — and when you want to convert a video, simply drag the video onto the droplet.

Enjoy!

UPDATE:

Folks, for those of you having trouble installing the workflow version, here's a tip, as mentioned in the comments: Double-clicking the unstuffed workflow will open it in Automator. From here you can choose File->Save As Plug-in...

Installing Workflows the Easy Way

Make sure it's a Plug-in for: Finder, and hit the Save button. It should now show up as an option in the Finder's contextual menu.

And remember, there is a Droplet Version as well whose installation is drag-and-drop. To anywhere!

Hope that helps!