Software Update Downloader

There are at least a few folks who are less than happy with Apple's decision to remove the option to download and keep updates from the Software Update application in Snow Leopard. I count myself among them.

Though the option may be gone from the GUI, however, it still exists in the command line version. Rob Griffiths solution is to use the command:

softwareupdate -d

There are a couple problems with this. The first is that the command, as listed in Mr. Griffiths article, doesn't do anything, at least not when I run it. From what I can tell the command requires the -a flag. So if you want it to actually work, it should look like:

softwareupdate -d -a

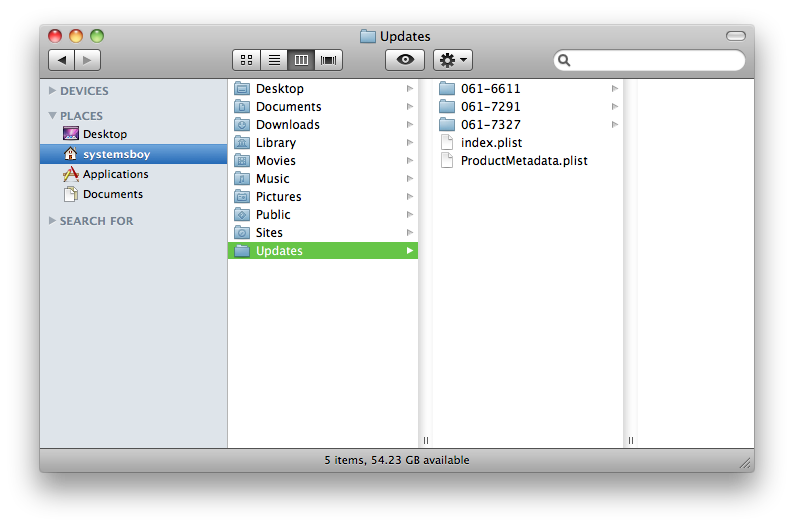
This will download everything you don't already have to a directory that the Software Update app can see (/Library/Updates). Now we're off to a more promising start.

The other problem with this method is that it doesn't offer a great deal of things you normally get with the GUI. In particular, as Pierre Igot points out, you don't get a progress indicator. Which really blows, I agree.

You also don't get prompted to install the updates once downloading has finished. To that end, I've written a little Automator Service. The service, when launched from any Services menu in any app, will prompt you to continue with this confirmation box:

Once you click OK, the download will begin. When the download is complete, the service will copy the new updates to an Updates folder at the top level your home account (~/Updates) for safe keeping.

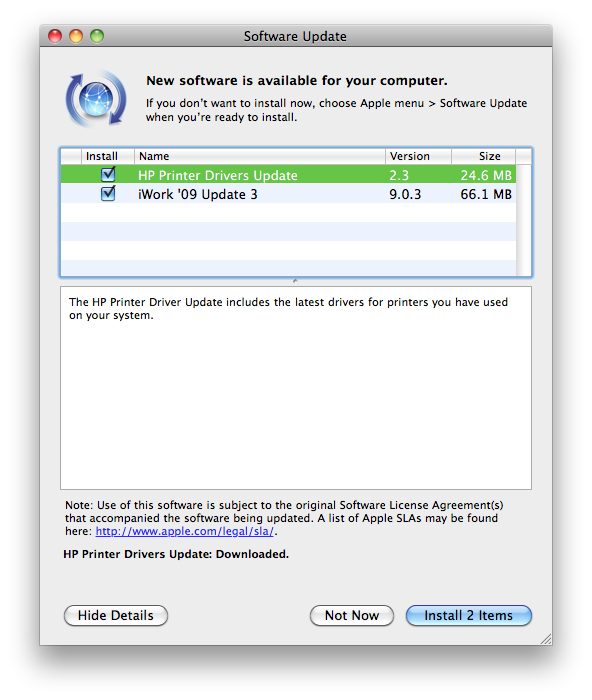
Once copying has finished, the Software Update app will launch and ask you if you want to install the updates you just downloaded. Just install as normal. Let Software Update do its business.

In the end everything will get installed and you'll be left with copies of all the updates in your home account for later use, all with only a single download.

While I can't really offer a progress bar, I like this better than the alternatives. It more closely approximates the old "Install and Keep" Software Update method than having to go and open the Terminal and do all that stuff as individual steps. And it's almost as user-friendly, being activated from a drop-down menu, just like Software Update usually is.

So here it is. The Software Update Download service:

Software Update Download Service

Download it, unstuff it and put it in ~/Library/Services. You should be able to launch it from the Services menu in any application.

A minor disclaimer: this service has mostly worked well for me, but there was one instance in which it seems to have had troubles. In particular, it seemed to choke on the latest iWork '09 updates. This may have been a fluke, or it may have had something to do with that particular update. I honestly don't know. But if you have troubles, let me know in the comments of this article. I'll do my best to figure out what's wrong as I'm using this in my own workflow. But consider this a beta at best; it's been through minimal testing.

Also, you should be able to open the workflow up in Automator and make adjustments to the behavior if you so please. Feel free to do so and let me know about it in the comments.

Enjoy!

OGG Theora Converter

John Gruber today opines that there is no GUI interface for the command-line tool for converting Quicktime movies into the OGG Theora format — a very handy thing to be able to do if you want to serve video to Firefox-type browsers using HTML 5's <video> and <audio> tags.

Since this is something I do a lot — wrap command-line tools in Automator wrappers, that is — I thought I'd whip up a GUI method for doing this. So here it is.

The OGG Theora converter

It's a Finder workflow, so download it, unstuff it and put it in:

~/Library/Workflows/Applications/Finder

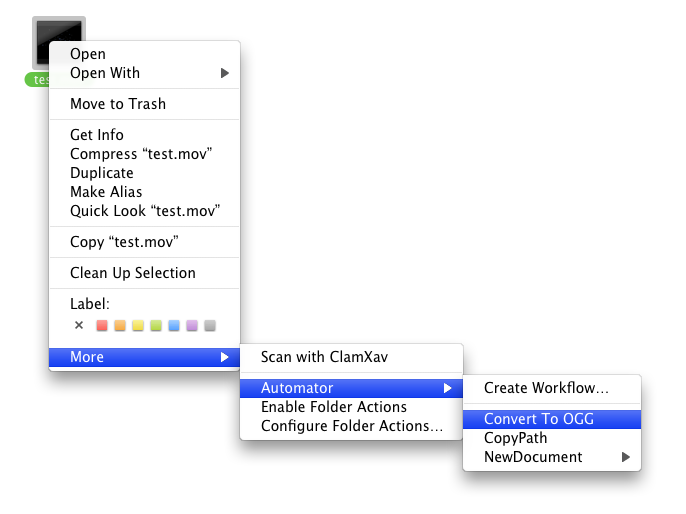
Placing the workflow there will add the item to the Finder's right-click contextual menu. To use the workflow, simply right-click a video you want to convert, navigate to More->Automator and choose "Convert To OGG" from the menu.

Ogg Converter Workflow

While this crunches you'll see a badge in your menubar:

Menubar Progress

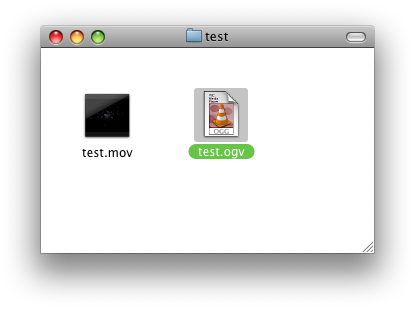
Wait a few minutes and you'll see the OGG version appear right alongside your original movie.

complete

And remember, you must first install the OGG Theora converter tool, ffmpeg2theora, for all this to work.

I've made a droplet-style version of this as well. Place this version anywhere — your Desktop, the Applications folder, your Dock — and when you want to convert a video, simply drag the video onto the droplet.

Enjoy!

UPDATE:

Folks, for those of you having trouble installing the workflow version, here's a tip, as mentioned in the comments: Double-clicking the unstuffed workflow will open it in Automator. From here you can choose File->Save As Plug-in...

Installing Workflows the Easy Way

Make sure it's a Plug-in for: Finder, and hit the Save button. It should now show up as an option in the Finder's contextual menu.

And remember, there is a Droplet Version as well whose installation is drag-and-drop. To anywhere!

Hope that helps!

Scripts Part 8: Toggle Hidden Files

Yes, you read that right. It's time for another entry in the Script Sharing category. It's been a damn long time since I've posted anything here, but I've actually been doing a lot of scripting, and I just realized that I had some potentially useful stuff lying around. So hopefully I'll be able to post some new stuff to this section once and a while.

Also, in reviving the Script Sharing series, I realized that all the old scripts were missing. Seems when I switched ISPs a while back, I forgot to move over the archive. Well, never fear, they're all back now.

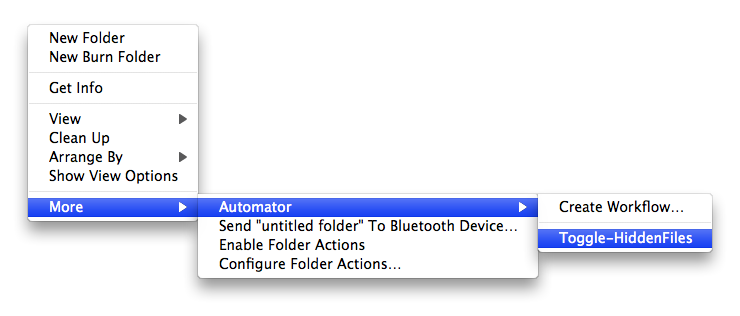
Today's script is actually an Automator workflow for the Finder. (What sort of workflow designer would I be if I didn't create the odd Automator workflow every now and again?) This workflow will turn hidden files on and off in the Finder. To enable it, simply unzip the below-linked download and place the resultant file in your Workflows folder (~/Library/Workflows/Applications/Finder).

toggle-hidden-workflow

To access it, right-click (or control-click) anywhere in the Finder and navigate to More->Automator in the contextual menu. Select "Toggle-HiddenFiles" and your Finder will restart. When it comes back up, you'll notice that hidden files are no longer hidden. To reverse the effect, simply repeat the process. Rerunning the script will re-hide invisible files.

So, here's the script:

Toggle Hidden Files Workflow

Enjoy!

Scripts Part 7: Contextual Menus with Automator

Recently, for some odd reason, there has been a spate of solutions to the problem of creating new files in the Finder via a contextual menu. One involves a contextual menu plugin called NuFile. Another involves installing Big Cats Scripts and linking it to an Applescript. But honestly — and I'm surprised someone else didn't think of this first — when faced with simple contextual menu tasks, these days my first thought is to look to Automator.

And by golly, that's just what I did. Here are a few Automator workflows that do, more or less what the afore-linked methods do. To me, the advantage of the Automator approach is that you don't need to install anything. It's all baked in. Which means you don't ever need to update anything either. Nice. Simple. And, yeah, kind of the whole point of Automator.

So here you go. Maybe someone will find this useful, if for nothing other than as an exercise in creating contextual menu functionality with Automator. Or skinning a cat multiple ways. Or something. To use this, download the .zip file, unzip it and place it in:

~/Library/Workflows/Applications/Finder

NewTextFile Workflow

It should become active immediately.

Also, here are a couple variants. One will create a text file, and then open it in TextWrangler (if you have TextWrangler, and if you don't, go get it now); the other creates a Word document, and opens it in Word. I'm far to lazy to completely duplicate the functionality of NuFile. But if you examine these workflows, you can at least see now how that would be possible (in fact, fairly easy) to accomplish.

NewTextFile Workflow Variants

I actually think it would be great if Apple made it drop dead simple to create true contextual menus for the Finder. Fortunately, Automator gets us pretty close.

Oh, yeah, and since this is technically script writing, and since I haven't posted to that series in some time, we're gonna go ahead and call this a Script Sharing post. Deal with it.

Right. Good night.

UPDATE: Revised March 31, 2007, 3:00 PM

Stephan Cleaves has added yet another implementation of this idea. He's using a combination of Automator and AppleScript. I certainly think his implementation is better than mine in a few ways. Certainly more full-featured. It will prompt for a file name, for instance, and takes pains not to overwrite a preexisting file with the same name. Nice. But we're taking very different approaches to the same idea (his version places a file in the front-most Finder window, my version places it in the right-clicked folder), and he was confused by my approach. After speaking to him via comments on his blog, I realized that some clarification as to how my workflow is actually constructed might be in order.

Basically, my workflow takes the folder selected in the Finder as input and assigns that input to the variable "$@". That variable and the for loop in my workflow are automatically generated by Automator when you select “as arguments” from the “Pass input:” field in the “Do Shell Script” action. It’s how you get the context (the selected folder) passed to the script. Apparently Automator takes “$@” as the variable for “the folder you just selected” whenever there’s no input from a previous action. This was something I learned while fiddling around with all of this, and it's really my favorite part. The coolest thing for me here, really, was figuring out how to pass the context — i.e. the right-clicked folder — to an Automator "Do Shell Script" action. This opens up worlds of potential.

Finally, as I said, the for loop in the action is auto-generated by Automator. The workflow will work almost as well with the simple script:

touch “$@/NewText.txt”

Using the for loop, however, allows you to create a new text file in multiple folders by selecting said folders and running the workflow.

It's really kind of amazing how many ways there are to do this. Wow. Fun stuff.

Scripts Part 6: Archiver

A hint on MacOSXHints yesterday discussed using tar to create backups in Mac OS X. The poster was frustrated with the OS X-bundled version of the zip command, and confused by the way the Finder creates .zip files. Indeed, the Finder does not use the zip command to create its .zip files, and indeed it is confusing. And, more importantly, the zip command does not preserve all-impotant Mac OS X resource forks.

After reading this hint I was reminded of a script I wrote a while back based on yet another MacOSXHints hint that uses ditto to create Finder-like .zip archives. So it seemed like a good time to post the script here and add it to the waning ScriptSharing series.

So here it is: my Archive script. It will both archive and expand folders or files using ditto, and it places these archives on the Desktop.

Archiver Script
See the code