Mom-Friendly PhotoBooth Post

Hello, and happy Mother's Day!

My mom recently switched over to the Mac platform, and she wanted to take a photo for me. I told her she could use the built-in iSight camera and PhotoBooth on her MacBook Pro to take the shot, but she couldn't figure out how to do it.

No problem, Mom. Let me see if I can help you out.

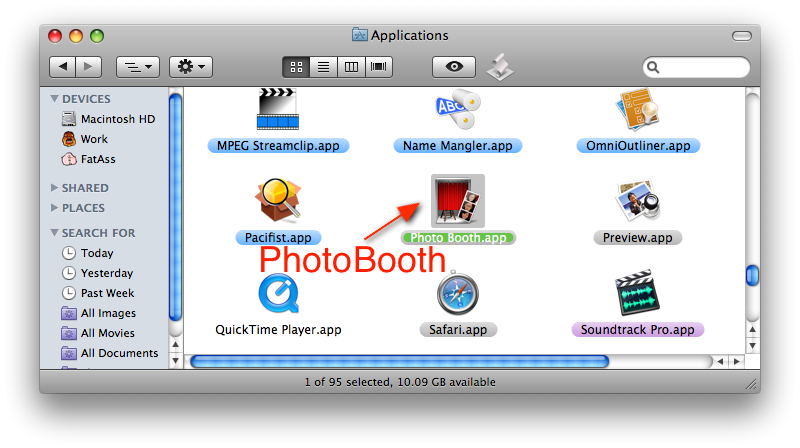
My guess is that you're still a little unfamiliar with where to find applications on the Mac. This is pretty typical of switchers. All your applications are in a folder aptly named "Applications" at the top level of your hard drive. That's the silvery-gray thing on your Desktop. It's probably called "Macintosh HD."

Your Hard Drive: Double-Click to Open

Open it up by double-clicking it.

A window should open with a folder inside it called "Applications." Open that as well with a double-click.

Hard Drive Items

Now you should see a fairly lengthy list of items. These are all your applications. Some items in this list are the actual, executable applications themselves. Some are folders that contain the applications. Sometimes it's hard to tell the difference. Fortunatly, PhotoBooth is easy: Scroll down until you see the item named "PhotoBooth," and — yup, you got it — double-click it to open it.

Applications

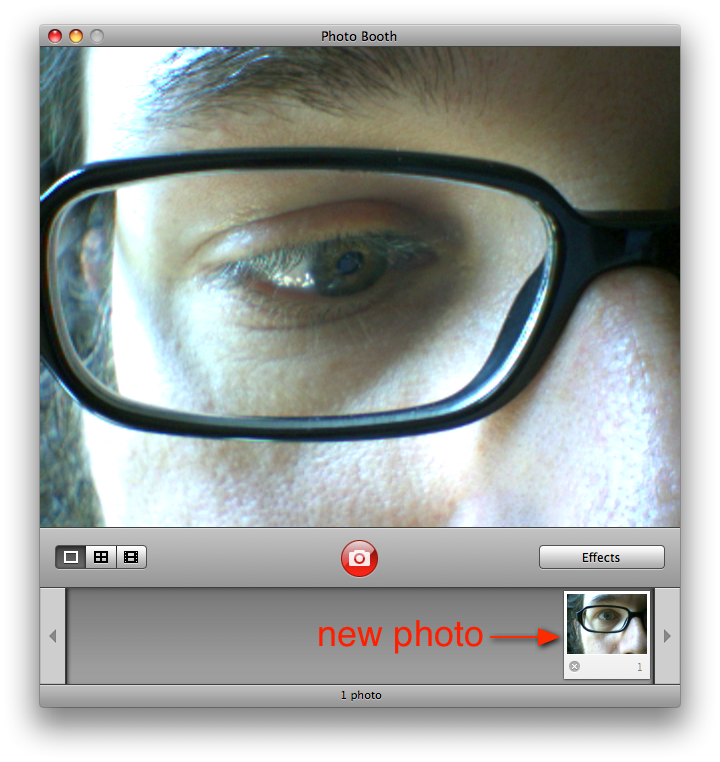
You should now be staring at an interface, at the center of which should appear your very own face. This is because the camera is now active and PhotoBooth is showing you what it sees. Since the camera is located at the top center edge of the computer display screen, it sees you.

PhotBooth: Photo Mode

To take a picture, simply press the red button. A short countdown will occur, a flash and then, voila! A picture will appear at the bottom of the  PhotoBooth interface. To look at the picture, simply click it once and it will appear in the main frame of the application window.

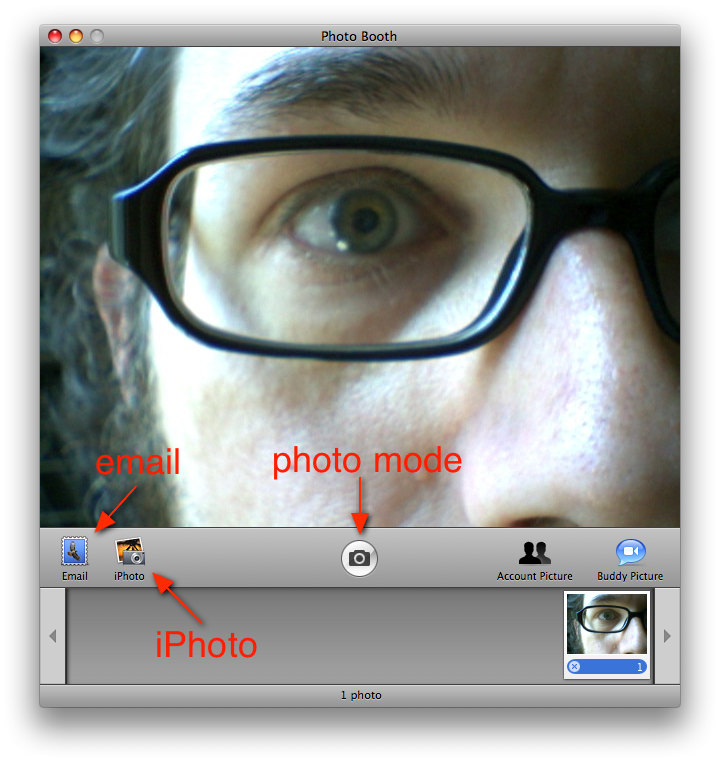
PhotBooth: View Mode

From this viewing mode you can email the picture by pressing the "Email" button on the left hand side of the tool bar towards the bottom of the application window.

PhotoBooth: View Mode

To switch back to photo mode, press the round camera button in the center of the tool bar and continue taking photos to your heart's content. Photos can also be dragged directly from the strip of shots at the bottom of the window to anywhere you'd want to put them: the Desktop, an email, wherever. You can also arrange them in iPhoto if you want, by pressing the iPhoto button. But I'll leave it for you to explore beyond that.

Hopefully this will help you out, Mom. If not we can go over it next time we see each other.

Enjoy your Mac!

Exposé and the Tab Key

I don't know if this is general knowledge or not, and I'm not a big Exposé user, so I could easily be ignorant of such a thing, but I just discovered that you can cycle through Exposé-activated applications using the tab or tilde keys. Here's what you do:

  • Hit the Exposé key (which is F3 on my nifty metal keyboard).
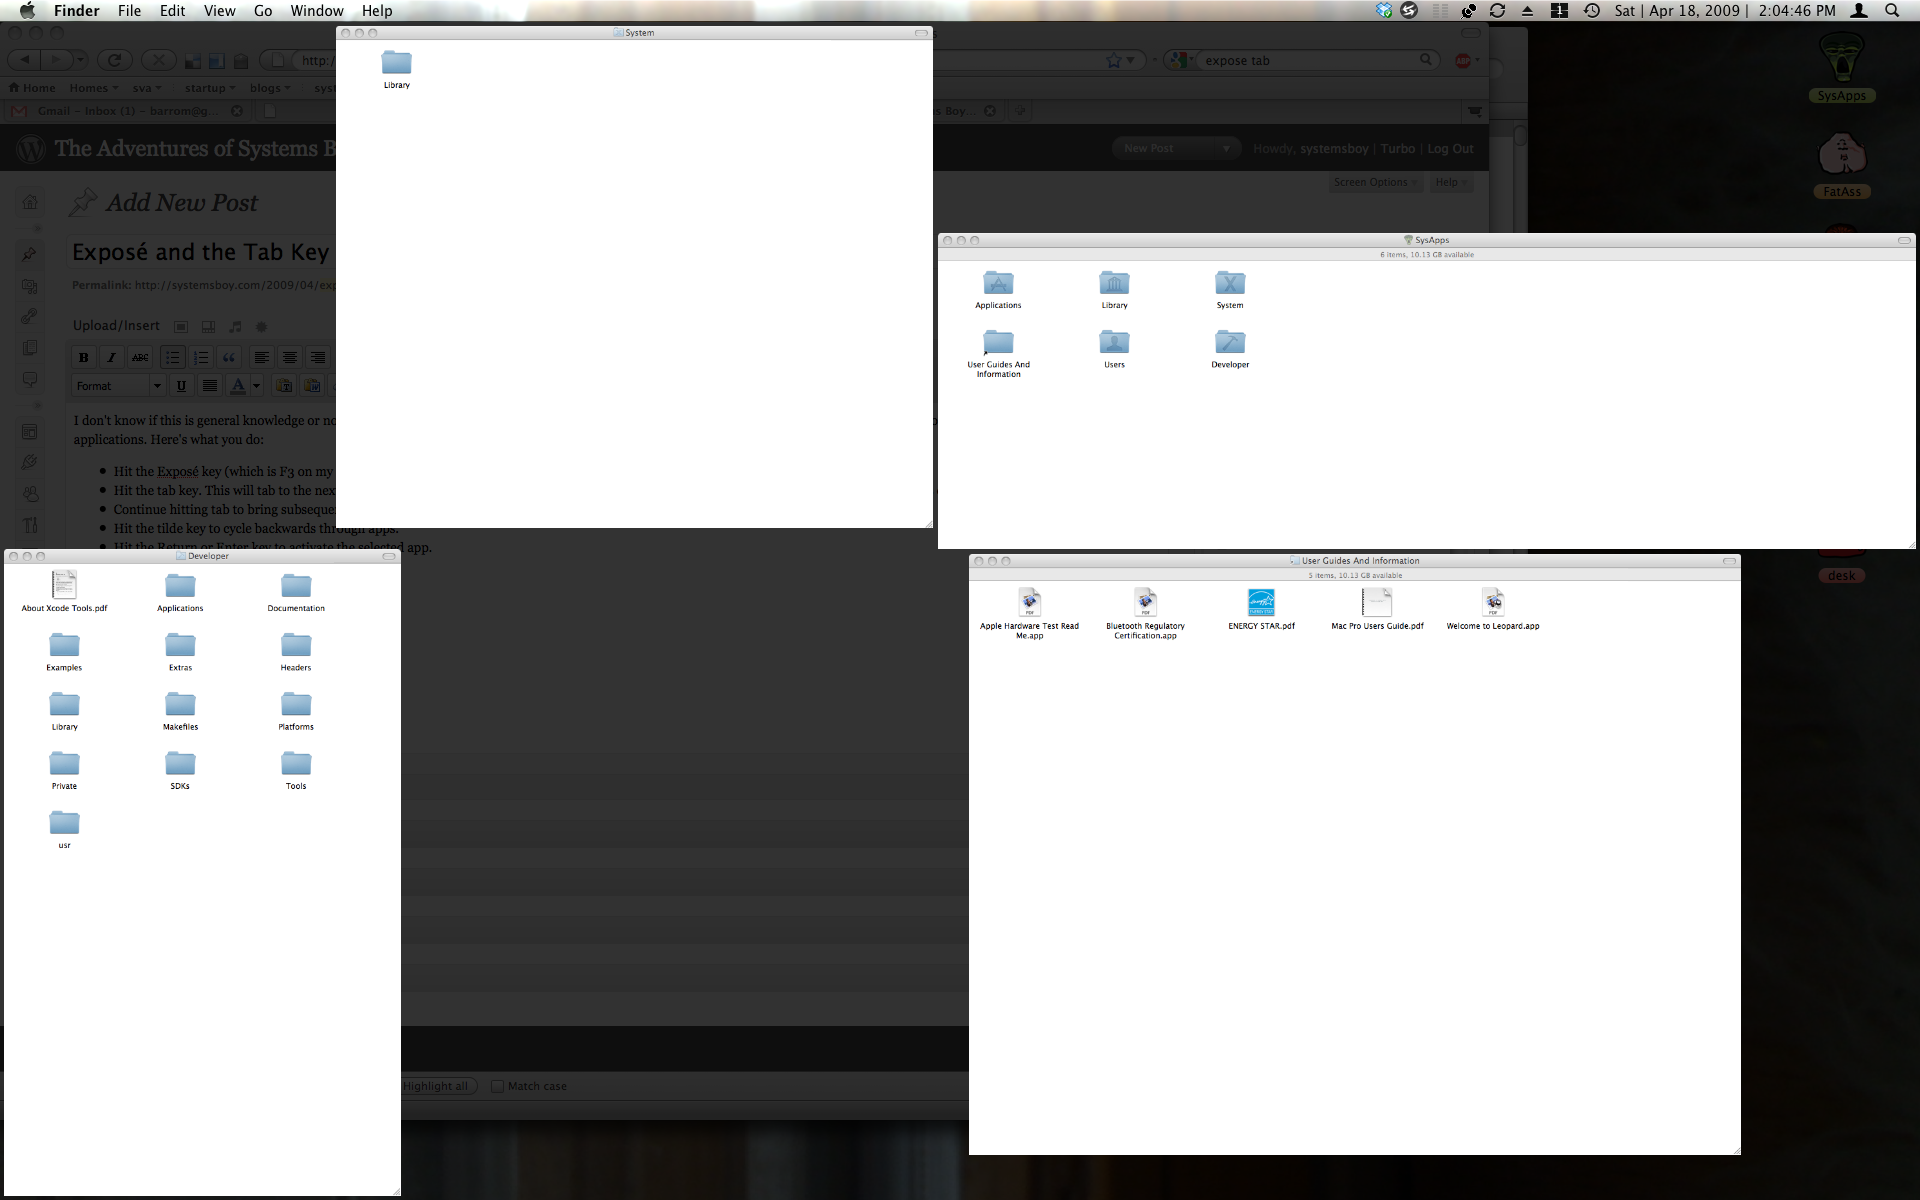
  • Hit the tab key. This will tab to the next application and display it as though it were in Exposé's application window mode, showing all the app's open windows.

    Exposé Tab Selection

  • Continue hitting tab to bring subsequent apps to the front.
  • Hit the tilde key to cycle backwards through apps.
  • Hit the Return or Enter key to activate the selected app.

This is pretty cool. Who knows, maybe it'll even encourage me to start using Exposé.

Maybe.

Safari 4 Beta Destroyed My Finder

I don't know about anyone else, but after installing the new Beta of Safari 4 my Finder kept dying. Poor beast would lock up. I'd force quit her and she'd never come back to life. The only way I could get her back was to either A) hard reboot with the metal button on the front of my tower (a PPC G5, mind you), or B) SSH in and: sudo killall loginwindow

Safari 4 Beta: The Finder Killer

Bummer.

Since uninstalling it, using the included uninstaller (which also hung after the "Restart" prompt, forcing a hard reboot), the problem has cleared up.

Anyway, this is just my experience, but word to the wise people. Beta means beta.

Oh well. Moving on.

Alternative File Duplication

I just recently discovered a handy trick. Normally, when I want to duplicate a file, I select the file and hit the command-d key combo. This will make a duplicate of the file and append the duplicate's name with "copy." So, if I duplicate a file called "test.txt" using this method the duplicate will be named "test copy.txt." And that's fine. But I almost never want to append with "copy." I'd almost always rather have the file appended with a number instead, like "test.txt" and "test 2.txt." Well, it turns out there's actually a way to do this. Traditional Duplicate: FileName+copy

Option-dragging the file within the same folder produces a duplicate file with a sequential number appended to the file name. So, select our "test.txt" file and hold option key while dragging the file to the same folder in which the original exists and you will indeed produce a file called "test 2.txt." Furthermore, option-dragging "test.txt" or "test 2.txt" in the same manner will produce "test 3.txt" and so on. The smartness abounds!

Option-Drag: Numbered Duplicates

This is a much more systemsboy-friendly approach. I only wonder why it's not the default. I mean, it seems to me like this would be the preferred behavior for most people. Who knows, though, maybe it's just me.

In any case, hopefully some TASB readers find this tip as useful as I do.

Here, BTW, are the details of Leopard's file duplication methods.

The Case of the Changing Case

Try copying two items whose names match in every way except case from a local drive to another local drive in the Mac OS X Finder and you'll see something like this: local-local

This makes plenty of sense. The Finder (actually, the filesystem on which the Finder resides, in this case HFS+) is not case-sensitive by default, so it sees the file "intro.mpg" as being identical to "Intro.mpg" and therefore simply alerts the user of the presence of a like-named file and asks him how to proceed.

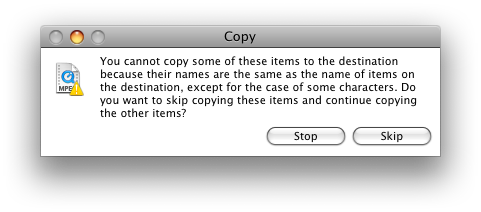
But the other day I got the strangest alert I've seen in a while when trying to copy a file named "Intro.mpg" from my networked home account to a local folder with a file called "intro.mpg":

From Network Drive to Local Drive: Case Issues!

Seems that, all of a sudden, we have some case issues. Now why would that be?

It appears that if the originating file comes from my network home, and if that network home lives on an NFS mount, and if the filesystem that hosts that network home is case-sensitive — all of which in this case is true — the Finder kinda freaks out. Or at least alerts the user in a very strange way. I mean, what's with that wording? I don't think I've ever read a more convoluted sentence in my life. And the options spelled out in that sentence — "skip" or "continue" — are not reflected in the language used by the buttons — "Stop" or "Skip." Tsk, tsk! And "some of these items?" Dude, it was only one item. I swear.

Actually, this last one I think I understand: Though I was only copying one Finder item, as users of non-HFS filesystems might be aware, copying between HFS and non-HFS filesystems will cause the creation of dot-underscore files, which are there to preserve HFS-specific data about the file in question. These files automatically get created and follow the file around invisibly, transparently to the user. I believe the Finder was taking these additional files into consideration in the alert. This may or may not be true. I can really only guess. But that's my hunch.

Nevertheless, this alert is abominable, if somewhat amusing. Apple still has some work to do when it comes to the wording in their alerts.

And they clearly have some work to do when it comes to dealing with conflicts on non-HFS volumes as well.

UPDATE: I've changed this post slightly for clarity.